What Is a Retest in Trading? Support and Resistance Explained
Learn what a retest in trading means, how breakouts flip support and resistance, and why pullbacks happen. Read the full guide.
By Trader Faculty Team
Direct Answer
A retest in trading occurs when an asset's price breaks through an established support or resistance level, moves away briefly, and then returns to touch that same level from the opposite side. Traders watch this pullback to see if the broken barrier holds its new role — old resistance acting as new support, or old support acting as new resistance — before the trend continues.
A retest in trading happens when price breaks past a key support or resistance level, pulls back to touch that broken level, and tests whether it holds before continuing in the breakout direction.
You have probably watched a price chart shoot past a clear ceiling, jumped in late, and immediately watched the market snap back against you. Or maybe you hesitated, missed the first surge, and watched price dip back to the exact breakout line before moving on without you. Understanding what a retest in trading actually shows helps you read these pullbacks calmly instead of chasing candles.
Quick Takeaways
- A breakout flips old support into new resistance and old resistance into new support — a shift traders call role reversal.
- Pullbacks happen because early traders take profits, trapped traders exit at breakeven, and patient buyers or sellers wait at the broken zone.
- Waiting for a retest can give you a clearer stop-loss spot, but strong trends often run away without ever pulling back.
- A retest is not a guaranteed bounce — price can slice straight back through the level and turn the move into a false breakout.
What Is a Retest in Trading?
A retest is the second visit to a price level after a breakout—the point where the market checks whether an old barrier has flipped into a new one.
Beginners often mix up an initial test with a retest. When price approaches a ceiling that has never been broken and bounces off it, that is a test of an intact level. A retest only happens after price breaks cleanly through that ceiling, steps away from it, and then returns to touch the same zone from the other side.
Think of a multi-story building. While you are on the first floor, the concrete slab above you is your ceiling. Once you climb the stairs to the second floor, that exact same slab becomes the floor beneath your feet. On a price chart, this shift is called role reversal.
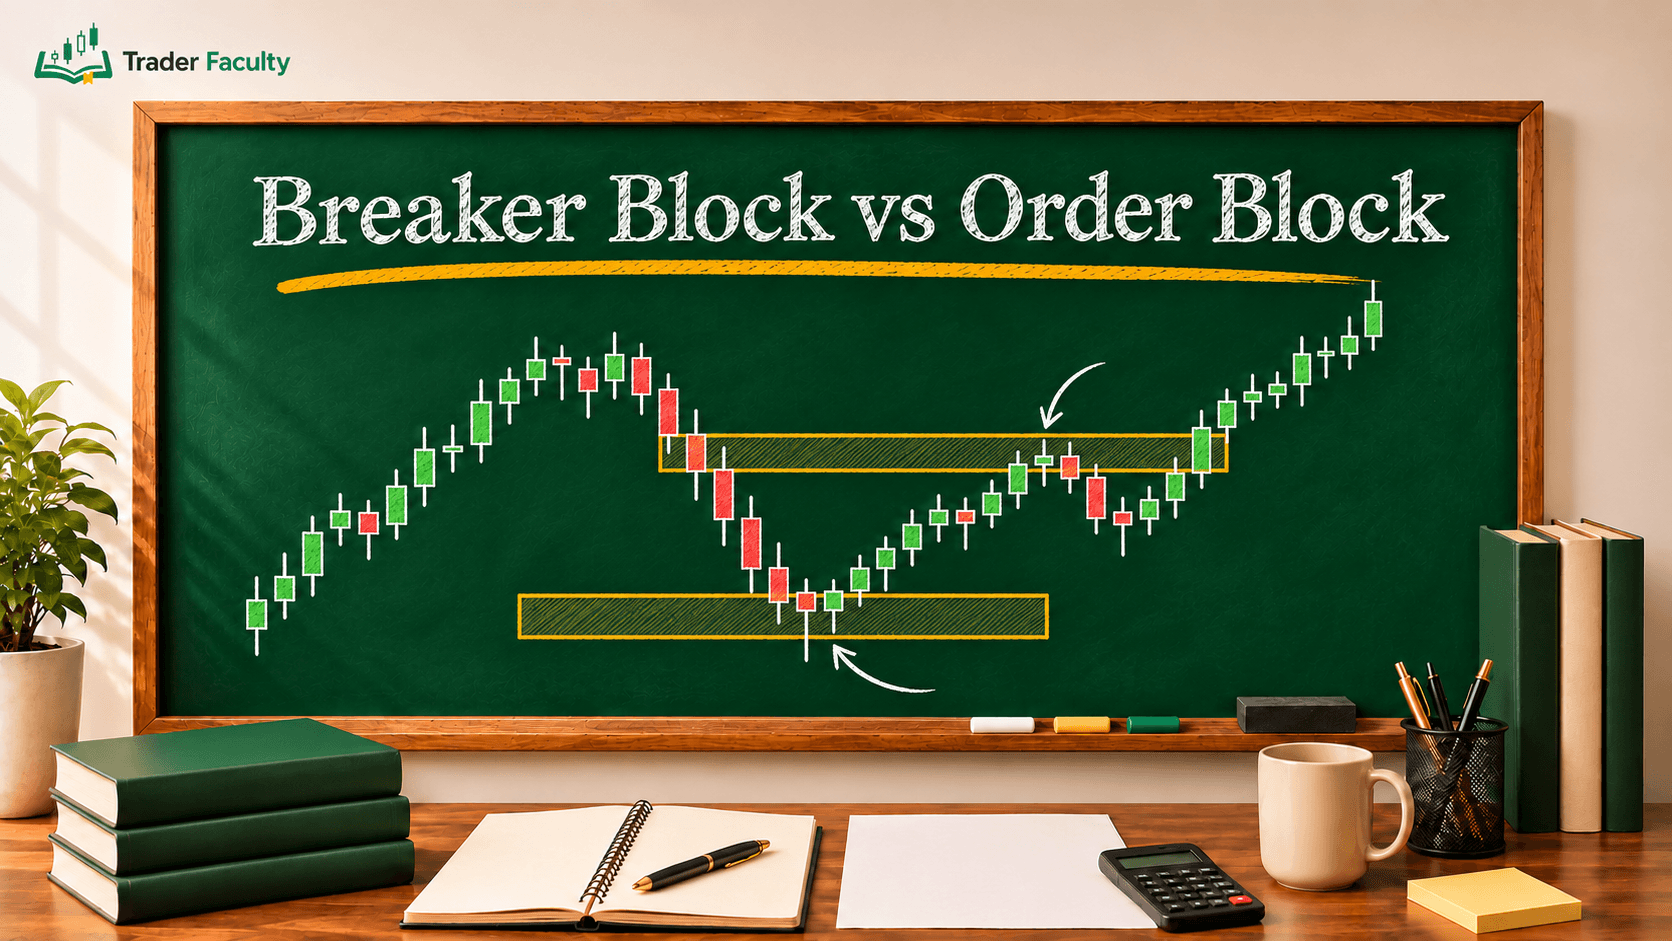
When price breaks above resistance (a price ceiling where selling has stopped upward moves in the past), that broken ceiling often acts as new support (a price floor where buying steps in to slow or stop a drop). The reverse happens in a downtrend: when price breaks below support, that broken floor often turns into new resistance. Understanding the retest meaning in trading comes down to watching whether that newly flipped floor or ceiling actually holds its weight.
How a Retest Works on a Price Chart
A retest in trading unfolds in three clear phases on a price chart: a decisive break through a level, a controlled pullback to the broken zone, and a reaction that shows buyers or sellers defending that area.
Depending on the direction of the breakout, you will see one of two setups:
- Bullish retest (resistance turned support): Price pushes above a well-defined resistance zone and closes beyond it. After moving higher for a few candles, price drifts back down to touch the top of that old resistance zone. Instead of falling back inside the old range, buyers step in, candles leave downward wicks (thin lines below the candle body showing rejected lower prices), and price turns upward again.
- Bearish retest (support turned resistance): Price drops below an established support floor. It then bounces back up toward the underside of that broken floor. Sellers step in at the zone, upward wicks form as higher prices get rejected, and price resumes its move lower.
Why Do Retests Happen in the Market?
Retests happen because different groups of market participants react to a breakout at different times, creating temporary counter-pressure that pulls price back to the breakout zone.
Behind the candles on your screen, three everyday order-flow behaviors drive most retests:
- Early breakout traders take profits: Traders who bought right as price cleared resistance often lock in partial or full gains once the first burst of momentum slows. Their sell orders push price gently back down toward the breakout line.
- Trapped traders exit at breakeven: Traders who shorted (bet on falling prices) at resistance are suddenly underwater when price breaks higher. When price dips back toward their entry point, many close their losing positions to escape without a loss, which adds buying pressure right at the old ceiling.
- Patient traders wait for a better price: Many traders refuse to chase fast green or red candles. Instead, they place limit orders (instructions to buy or sell only at a set price or better) at the broken level and wait for the market to come to them.
None of these forces guarantee that the level will hold. They simply explain why price so often revisits the exact area where the breakout began.
Breakout Entry vs. Retest Entry: Key Trade-Offs

Neither entering on the initial breakout nor waiting for a retest is better in every market—each approach trades one type of risk for another.
If you enter the moment price crosses the line, you catch every big trend, including the ones that never look back. The catch is that you also get caught in fakeouts (false breakouts where price pokes past a level, triggers breakout orders, and immediately reverses). If you wait for a retest, you filter out many fakeouts and get a tighter spot for your stop-loss, but you will watch strong trends leave without you.
| Factor | Breakout Entry | Retest Entry |
|---|---|---|
| Entry timing | Immediately as price closes past the level | After price pulls back and reacts at the broken level |
| Main advantage | Never misses fast, runaway trends | Avoids many fakeouts and offers a clearer stop-loss level |
| Main risk | Higher chance of entering a false breakout | Missing trades when price runs without pulling back |
For example (hypothetical numbers for illustration only): say a stock breaks above $50 resistance and climbs to $52 before drifting back to retest the $50 zone. A trader waiting for confirmation might set a stop-loss a few cents below $50, rather than exactly on the line, to allow for normal price noise during the retest.
Because a single touch of a horizontal line can still fail, many traders look for confluence—where two or more independent chart signals, such as a broken resistance zone lining up with a rising trendline or a moving average, point to the same area. Stacking extra context around the retest helps you judge whether the level has real backing rather than acting on one line alone.
Common Mistakes When Trading a Retest
Most losses around retests come from treating a flexible price zone like a rigid wall or assuming every breakout follows the exact same script.
Watch out for three common traps when reading retests on your charts:
- Assuming every breakout will retest: In fast-moving markets or after major news, price often breaks out and trends strongly without ever returning to the breakout zone. Sitting on your hands and then chasing late out of fear of missing out usually leads to poor entries and wide stop-losses.
- Treating a level as a thin line instead of a zone: Support and resistance are areas where orders cluster, not razor-thin lines. Price frequently dips slightly past the exact line during a retest before bouncing. Placing your stop-loss right on the line leaves zero room for normal market noise.
- Entering blindly before the level shows signs of holding: Touching a broken level is only the first half of a retest. If price slices straight back through the zone on large, heavy candles, the breakout has failed. Waiting for the candle to close and show clear rejection reduces the risk of stepping in front of a failed breakout.
Conclusion
A retest gives you a second look at a breakout by showing whether old support or resistance can hold its flipped role. By understanding the order flow behind pullbacks—and accepting that strong trends sometimes run without retesting while other retests fail completely—you can choose your entries with a clearer plan. As you build your chart-reading routine, explore more core tools in our technical analysis guide to see how price levels fit into the bigger market picture.
Trading always carries the risk of losing money, so treat everything here as a starting point for your own research rather than financial advice.
Frequently Asked Questions
What is the difference between a test and a retest in trading?
A test happens when price approaches an intact support or resistance level and bounces off it without breaking through. A retest only happens after price has already broken past that level, moved away, and then returned to touch the broken zone from the opposite side to check whether it holds.
Do all breakouts have a retest?
No, not every breakout pulls back for a retest. In fast-moving markets or after major news catalysts, strong trends often push straight ahead without ever returning to the breakout zone. Waiting for a retest filters out many false breakouts, but it also means missing runaway moves that never look back.
How do traders tell a valid retest from a false breakout?
Traders watch how price reacts once it touches the broken level rather than entering on contact alone. Clear candlestick wicks rejecting the zone and a candle close back in the breakout direction point toward a valid retest, whereas large candles slicing straight back inside the old range signal a failed breakout.
What is the break and retest rule in trading?
The break and retest rule is a price-action approach where a trader waits for two steps before entering: first, a decisive candle close past support or resistance, and second, a pullback to that broken level that shows clear rejection in the new trend direction. It trades early entry speed for extra confirmation.
What timeframe works best for trading a retest?
Break and retest setups appear on every timeframe, from five-minute intraday charts to daily and weekly swing charts. Higher timeframes such as the four-hour or daily chart generally produce cleaner support and resistance zones with less short-term noise, while lower timeframes require tighter risk management around sudden spikes.
Keep learning
TA Masterclass
Reading charts one article at a time? Get the full method, in order.
10 lessons quiz
Start TA MasterclassThe Trader Faculty Team writes and reviews every guide together — pairing hands-on market experience with a curriculum-first approach to trading education. One good syllabus, taught in the order that makes you better.